Monday, April 27, 2020

Face Mask

Hi, folks. A bit of personal news: I had a mild case of COVID-19 or something very similar. I haven't been tested, so it's impossible to know for certain, but I'm fairly sure that's what it was. I'm fine. I wasn't that sick, and I've fully recovered.

It's been a while since I've blogged, but I haven't been idle. I've actually finished knitting a cardigan except for sewing on the buttons. Since I need to go to a physical store to find the right ones, that will have to wait until the lockdown is over.

In the meantime, here's my homemade face mask. Although I can't catch the virus anymore or spread it by breathing, sneezing, or coughing (it's still possible for me to spread it by touching contaminated surfaces or people and then touching other surfaces or people, so I'm still limiting my trips), I've had to make one so that I can catch the bus to go the grocery store. They've recently started limiting the number of people allowed on the buses, and knowing our local bus drivers*, I'm sure some of them will use the limits as an excuse not to pick up anyone they don't like the look of, so I'll be wearing a mask when travelling by bus.

*These are the same people who threatened to strike during the Great Recession because they thought they weren't being paid enough, nevermind that they were making twice what the average worker did plus benefits and they were lucky to even have jobs. Some drivers were also calling for the entire transit system to be shut down at the beginning of the coronavirus lockdown, nevermind that would have stranded many essential workers and those who depend on the buses to make essential trips. Except for helping the occasional person in a wheelchair, the drivers normally have no contact with passengers, and since the lockdown started, the front of the buses have been roped off and passengers are boarding at the back plus the buses are being disinfected regularly, so the drivers aren't in any more danger than the rest of us.

Anyhow, here's my mask. I used this pattern. I skipped step 4 since I sew everything by hand and didn't have to worrying about the layers shifting. I used fabric out of my stash.


Thursday, November 14, 2019

Pocket Potholder

I made another pocket potholder. All of the sewing and quilting was done by hand.


This was my first attempt at marking a quilt top to do a fancy quilting design rather than stitching in the ditch or following a design printed on the fabric. Among other things, I learned never to use Fons & Porter's white mechanical pencil leads to mark a quilt top. They did not wash out.


Thursday, October 10, 2019

Curtains to Cover That Gap Between the Blinds and the Wall

There is a huge gap between my window blinds and the wall that allows people to see into my apartment when the blinds are closed. On one side, the only thing anyone could see is my boxes of needlework projects and supplies, and I've been blocking the other side with a bookcase. However, I want to get rid of the bookcase, so I had to come up with something to cover that gap. Since I live in a rental, I couldn't simply install a curtain rod over the blinds.

So, I made curtains to cover the gap, and got creative about how to hang them. One side is tied to the blinds with a length of yarn, and the other side is nailed to the wall (we're allowed nails to hang things).

I cut out a long, skinny rectangle of fabric and hemmed the edges.


Then, using a sharp tapestry needle, I sewed a length of yarn through one layer of fabric in the hem so it wouldn't show on the front, and knotted the ends of the yarn to keep them from fraying. (I realize it's difficult to see in this photo since everything's black.)


Finally, I nailed the curtain to the wall and tied it to the blinds. It took me a few tries to get it right, but I managed it in the end. Hopefully the second one will be easier now that I know what I'm doing.


Friday, September 13, 2019

Peaks and Valleys

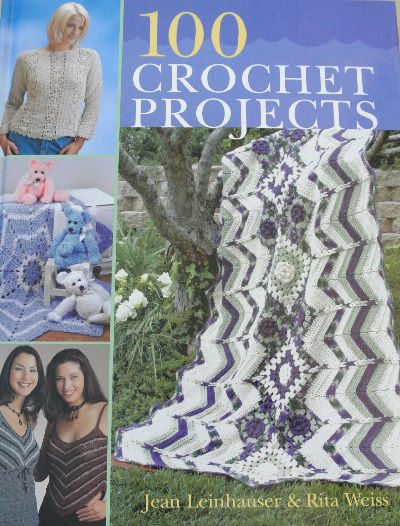
I've finished another Swedish weaving/huck embroidery towel. This one's based on Peaks and Valleys from Learn to Make Monk’s Cloth Afghans by Marilyn T. Magly.


Thursday, August 15, 2019

Laundry Bag

People often ask where creative people get their inspiration. Sometimes it comes from sheer frustration.

I had a typical store-bought laundry bag with a drawstring closure that I would wash every time I did the laundry so that I could put my clean clothes in the clean bag. The washing machines in my apartment complex are poorly designed and have a huge gap under the agitator that allows the machine to "eat" items. One day, the machine ate the plastic toggle on my laundry bag's drawstring and no amount of pulling and wiggling would dislodge it. I had to cut it loose. This is the second drawstring that I've lost to these machines. My anger at the thought of having to make yet another drawstring for this bag sparked my creativity. I had 2 problems to solve: 1) the bag's closure kept being eaten by the machine, and 2) store-bought bags are made out of cheap material that wears out quickly (this one was already showing enough wear that it probably wasn't worth fixing it again). So, I decided to make my own bag out of cotton duck cloth with a snap closure rather than a drawstring.

It's a very simple design. Using my old bag as a guide for size, I cut out a large rectangle, sewed a 2" hem, folded the rectangle in half, and sewed the side and bottom seams (I used a 1/2" seam allowance). Then I sewed the snaps to the hem. The finished size is about 30" x 39". The snaps are size 10 (1") and are metal rather than plastic. I sewed it by hand with cotton hand quilting thread, and in addition to cutting it out with pinking shears, I finished the seams by folding the seam allowances in toward the center and sewing them together so that all of the raw edges are fully enclosed. This thing is very durable and should last me a good long time. Also, the fabric was on sale so I bought enough to make 2 bags. When this bag eventually bites the dust I can salvage the snaps and sew a new bag. I'm never buying one of those cheap bags again.


Shamrock Kitty

I've finished Shamrock Kitty, a Mini-Kats™ design by Linda Connors of Calico Crossroads®, adapted from the artwork of Kathleen Kelly of Kats by Kelly™. This is one of the Kats that I had finished stitching before I started this blog.


Friday, May 10, 2019

Baby Babbles, Washcloths

I finished the towel based on Baby Babbles from Learn to Make Monk’s Cloth Afghans by Marilyn T. Magly.


I also crocheted 2 washcloths based on pattern #27 designed by Darla Sims from Leisure Arts' The Big Book of Dishcloths.


Thursday, March 14, 2019

Plum Granny Ripple

I finished crocheting the Plum Granny Ripple afghan by the late Janie Herrin.


As always, taking a photo of a large item like an afghan was a challenge. I ended up standing on my couch and leaning as far back against the wall as I could. I don't know how I'm going to photograph afghans and quilts once I get rid of the couch (which is happening soon, I hope).

Sunday, January 20, 2019

Dish Sponges

In my efforts to help out the environment by replacing as many disposible items with reusable items as is practical, I've been on a quest to find good reusable dish sponge.

I've been using these for a while. The scrubby side is made from a plastic fabric with raised white plastic dots.


The back is terry cloth, fiber content unknown.


These can be washed in the washing machine, but as you can see above, the plastic fabric splits and has to be mended. Also, the plastic foam sponge inside does break down over time and eventually these need to be thrown out, adding more plastic to the landfill. Also, the white dots fall off in the washing machine or while I'm doing the dishes, sending microplastics into the water system. Altogether, these are not an ideal solution.

Thinking about this recently, I realized that the scrubby side doesn't actually do that good a job of scrubbing. I've essentially been washing my dishes with cloth. And, since I'm good about rinsing my dishes right away and setting them to soak in soapy water, I don't actually need to scrub them. So, I decided to try my hand at creating my own dish sponges out of some sort of fabric.

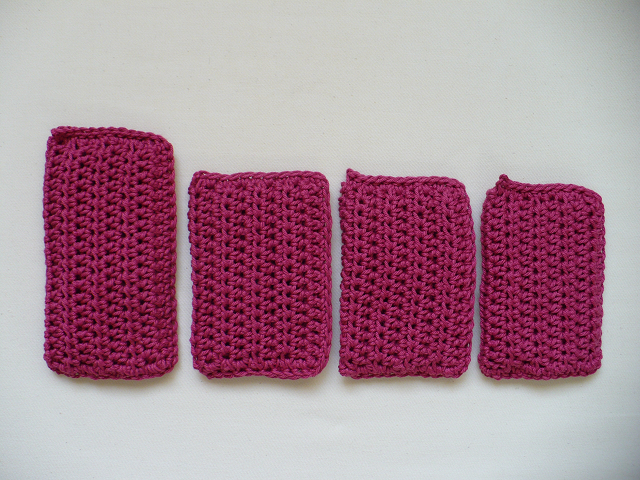
Using one of my existing dish sponges as a guide for size, I crocheted a rectangle that when folded up would be the desired thickness, folded it in thirds, and then crocheted the edges together.


The first sponge in that image demonstrates why one should always make a gauge swatch: even though my foundation chain was the same length as the old dish sponge, by the time I got through crocheting my rectangle it had grown quite a bit! I used the oversized sponge as my gauge swatch, adjusted my stitch and row counts, and made 3 more sponges, this time the right size. I used hdcs to make the rectangle because they work up fast and make a nice pattern on their own.

I just used one of these to do the dishes, and it did the job just fine. There was even an unexpected advantage: it was much easier to rinse the soap out and wring out the sponge than with the old model.

As a final note, I can never wring out my dish sponge without thinking about this episode of Frasier:


Tuesday, December 25, 2018

Bright Feathers

I finally finished stitching Bright Feathers.  I designed this before I learned to quilt.  I had tried to learn how to quilt but hadn't had much success.  I still loved the designs, however, so to get around my lack of quilting skills I started translating traditional quilt patterns into cross stitch.  This is one of those.  I'll probably rework the other designs as quilt patterns at some point.  I'm planning to do some actual quilting on this when I make it into a wall hanging.


Thursday, November 22, 2018

Granny Square Poncho

Lately, I've been curling up in front of the computer under an old cotton blanket, which is cozy, but kind of a pain since I have to keep readjusting it and clutching the front of it closed. So, I decided to make a cotton poncho. No pattern, I just grabbed some cotton yarn from my stash, decided on a color palette, and got to work. I crocheted granny squares in the shape of a poncho using a join-as-you-go method and added borders. The color placement was completely random. I made a few mistakes in the joinings, but I couldn't be bothered to rip back and fix them once I discovered them.


Friday, November 16, 2018

Fat Kat Tuesday

I finished Fat Kat Tuesday, a Mini-Kats™ design by Linda Connors of Calico Crossroads®, adapted from the artwork of Kathleen Kelly of Kats by Kelly™.


In future, when I'm making wallhangings and other items that won't get a lot of wear, I'm going to go back to doing a single binding rather than the double/French binding that I did on this one. The double binding is difficult to fold so that it doesn't stick out at the corners, especially when using a heavier fabric like the black that I'm using for these Kats. The single binding looks better.

Sunday, May 13, 2018

Orphans & Scraps

I finally finished quilting and binding my interpretation of Orphans & Scraps, a sew-along by Pam Buda of Heartspun Quilts. I actually finished it on Apr. 27, but I'm only just now getting around to blogging about it. I used Pam's instructions for the blocks, but chose my own fabrics and designed my own setting.


I'm rather disappointed in these photos. The colors are much more vibrant in real life, and this quilt is not as wonky as these photos make it look! Oh well, I'm a needleworker, not a photographer. [/McCoy] It is a bit wonky, however. This was one of my earlier projects, and I wasn't as good at piecing as I am now. I also used a double layer of batting since I'd bought some cheap batting that was so thin in places that I could see my hand through it. Furthermore, I wasn't that experienced at quilting when I started quilting this project. Still, I'm fairly happy with how it turned out.

Tuesday, March 6, 2018

Step Afghan

I finally finished my step afghan.


It's really difficult to photograph an afghan this large (62"x71"). I ended up standing on a step ladder holding my camera at a very odd angle just trying to fit it all in the frame. I actually finished it the week before last, but I was sick last week and couldn't get to blogging about it before now. I had to add borders to keep the edges from curling, and I've updated the pattern to reflect this. Also, as you can see from the photos this afghan could definitely benefit from blocking, but I'm not going to do that because 1) I don't have the space, and 2) I can't be bothered. I don't mind if it's a little wonky; it'll still keep me warm and keep this plastic yarn out of the landfill that much longer.

On that note, even after crocheting this monster afghan I still had acrylic yarn left over. I swear the stuff had been breeding.


I've given up on it. I acheived my goal of getting rid of all of my acrylic yarn by simply bagging it up, labelling it "Free Yarn", and leaving it in the laundry room for any of my neighbors who might want it. Except, that is, for 2 balls which I'm using to work out a pattern for an afghan I'm designing. Once I have that pattern worked out, the acrylic yarn goes in the laundry room and I'll buy some good yarn for the afghan.

Now for an update on my stitching schedule. My new schedule is working out really well, although I did have to make a couple of tweaks. I eliminated my weekly walk (I walk and take the bus everywhere, so I get enough exercise), and I divided my chores between Saturday and Sunday rather than trying to cram them all into Sunday. That feels a bit saner.

Also, I shortened my stitching time a bit. I discovered the book Daily Rituals: How Artists Work by Mason Currey, a collection of brief bios of artists' working days. This book was a revelation for me. I don't know about you, but I've always had this picture in my mind of an artist working all day long in their studio, only stopping to eat, drink, or sleep, and sometimes not even then. Well, guess what, folks: that's a myth. There were (and are) artists, to be sure, who did work all day at their art, but they're the exception rather than the rule. Most worked for short periods of time and then went and did other things, even those who were full-time artists. Many had day jobs and did their art when they could. After reading a great many of these bios, I decided to stop guilt tripping myself about not being a "real artist" and get more realistic. I noticed the time period of 3 hours cropping up again and again in these bios, so I decided to limit my stitching time to no more than 3 hours at a stretch (unless, of course, I get really involved in a project). So, now I'm doing my half hour of stitching in the mornings, and 3 hours of stitching in the afternoons, and it feels right. I start to get tired right at the 3 hour mark.

I've been sticking to this new schedule for the most part, lapsing occasionally when I'm ill or "life" happens, but I get right back to it as soon as I can. This looks like it could be a permanent routine.

Sunday, December 17, 2017

Bah Hum Bug, Update, Goals

I finished stitching the Bug of Bah Hum Bug by Michelle Lutzen of Stitchy Kitty.


I also finished stitching the Hum last year, but somehow forgot to blog about it. Anyway, here are all 3 parts stitched and ready to be finished.


Now to let you know how I did, or rather didn't do, on my yearly goals.

My goal for 2017 was to finish the following:

Country Quilt Footstool Caddy
Around the Town
Snuggles Quilts Block-of-the-Month (BOTM)
Elements of Nature I
Serenity
Rose Cross

As I've said in previous posts, I finished Elements of Nature I, Serenity, and the Rose Cross. Then, while I was working on Around the Town, I started feeling very frustrated and stressed out, to the point where I didn't want to do my needlework any more and had to force myself to work on it. I finally sat down and thought things out and realized that trying to finish all of my old projects before doing the projects I wanted to do was a mistake. I was making myself miserable for no good reason.

So, I started working on certain types of projects for at least 30 min. each week and doing what I wanted the rest of the time. That helped a lot, but it wasn't quite enough. I was still frustrated because I couldn't seem to spend enough time doing needlework. I only work at my day job for 15-20 hours per week, and I work from home so I don't have a commute. One would think that I would have plenty of time to do my needlework, right? Yet I couldn't seem to squeeze it in, and I couldn't figure out where my time was going. I call myself an artist, but I didn't seem to be actually doing much art.

Finally, I realized that I needed to get my priorities in order. I needed to focus on what's most important to me: my art. I decided to put in an 8 hour day on weekdays just like most people do, and spend half the day on my art and the other half on my day job. I could do chores and run errands on weekends (except for one errand that does have to be done on a weekday).

Every weekday, I do 30 min. of needlework first thing, so that no matter what happens that day, I will have spent some time on my art. Then, I do my day job. I eat lunch, and then spend another 3 1/2 hours on needlework for a total of 4 hours for the day (except on Tuesdays, when I have to run errands). Then I eat supper, after which I do any chores that can't wait until the weekend and/or rest. Saturdays, I feed my creativity by watching a movie and taking a walk (unless I have to run an errand, then I skip the walk). The rest of the day I do as much needlework as I can fit in, making certain to do at least 30 min. Sundays, I do 4 hours of needlework before lunch, and after lunch I do all of my chores for the week.

So, Mon., Wed., Thurs., Fri., and Sun. I'm doing 4 hours of needlework per day. Tues. and Sat. I'm doing at least a half hour per day. That's 21 hours per week which is more than my day job and a vast improvement on what I had been doing.

I've been doing this for a week and a half, and so far, so good. I only got in 19 hours this week because I had to run an extra errand on Thurs., but that's still more than my day job since I took Fri. off. I'm still adjusting to this new schedule, and of course the holidays will throw my schedule off a bit, but hopefully things will settle down in January and I can get into a routine.

As to what projects I'm working on, I have a set schedule of types of projects for my 30 min. first thing in the morning on weekdays. Mondays I work on UFOs, Tuesdays my designs, Wednesdays quilts that are in the quilting or binding stages, Thursdays projects that are in the finishing stages, and Fridays household items or clothing. The rest of the time I do whatever projects I want to work on. At the moment, I'm trying to focus on my designs on weekdays, but I plan to be flexible about that so that I don't drive myself crazy again. This way, I'm not neglecting any of my projects, but I still have the freedom to work on whatever I feel like.

This seems to be working. I've gotten a lot done this past week and a half, and I'm happy about which projects I'm working on. I'm also managing to get all of my chores done. I don't know where the extra time materialized from, but it does seem to be there, and I don't seem to be overtiring myself.

I haven't given up on finishing my UFOs. I'm still working on them at least once a week (often more), and I'm doing my best not to acquire more. I'm not starting any new projects except for my designs or things I need (such as household items or clothing) until I've finished my old projects. Eventually, I will reach my old goals of using up all of my acrylic yarn (yes, I'm still working on that one) and having only a few of each type of project.

As for the blog, I still plan to only post when I've finished something, but hopefully with the changes to my schedule I'll be finishing more projects and posting more often.

Friday, June 16, 2017

Elements of Nature I

I've finished stitching Elements of Nature I, which is adapted from the artwork of Jennifer Pugh.


This one about drove me crazy. Not only was there a major printing error on the chart (which was also poorly written), but there wasn't enough floss to complete it. Fortunately, I also bought the companion piece, Elements of Nature II, so I was able to rob that one to get enough matching floss to finish this one. Also, the color codes on the chart turned out to be DMC numbers, so I can just buy DMC floss to replace the colors I had to "borrow" and hang onto the leftovers from this kit to be sure that I have enough of the other colors. I'll also know to double check the chart before starting to be sure the sections line up properly so I won't have to do any frogging (I ended up cutting and taping this one together, and I had to fill in a missing column of stitches).

After this project, I'm finished with kits. There have been too many times when I've had to play floss chicken (hat tip to Phil at The Twisted Yarn for that delightful expression) or substitute a similar color because there wasn't enough in the kit to complete the project. Either that, or I end up throwing away a ton of extra floss because it can't be used in anything else. From now on, I'll only buy charts that use DMC colors and buy the floss and fabric separately. That way, I'll know I can buy more floss if I don't have enough, and leftovers can be used in other projects.

My elbow's healed enough to use an iron now (yay!), so I get to work on Around the Town next. See you when the next project's done. :)

Friday, May 5, 2017

Serenity

I've finally finished stitching Serenity by Joan Elliott. I actually finished it last Thursday but have only just got around to blogging about it.


So far, I'm right on track for my goal of finishing 6 projects this year. I haven't, however, been doing so well on my plan to work on one finishing project, one quilting/binding project, and one of my own designs each week. This year has been so crazy that I just haven't had as much time for needlework as I would have liked. Things seem to be settling down now, but I still think I need to scale back and just focus on my remaining 4 goal projects. Once those are done, hopefully I can start getting into a weekly routine.

I wanted to work on Around the Town next, but I hurt my right elbow (not badly) and until it heals I can't use an iron. Crocheting's a bad idea too, so I'm working on Elements of Nature I even though I'm rather tired of cross stitch at the moment. The good news is that it's coming along fairly quickly; enough so that I hope I don't finish it before my elbow heals as I don't fancy trying to learn to iron left-handed. :)

Saturday, January 14, 2017

Rose Cross

I've already finished one of my projects for this year's goal! Yay! I've finished stitching the Rose Cross by Irene O. Thomas. I actually finished it a week ago, but between work craziness and illness I haven't had a chance to blog about until today.


The remaining 5 projects won't go this quickly. 😉 This one was nearly done when I posted about my goals. So far, I've managed to work on a goal project, a quilting/binding project, and one of my designs each week. However, I haven't been working on a finishing project because that involves digging through my stash and the aforementioned craziness and illness has prevented that. I'm hoping this weekend to be able to get started on my next finishing project and get back on track.

Saturday, December 31, 2016

Goals for 2017

Hi, y'all! With 2016 almost behind us (thank goodness), it's time to start thinking about yearly goals again.

Setting a yearly goal and then working on a project in the finishing stages at least once a week worked so well for me last year that I want to continue in the same vein this year. So with that in mind, I listed all of my projects and thought about how I wanted to approach getting them done. Eventually, I would like to work on at least one finishing project, one quilting/binding project (as opposed to piecing a quilt), and one of my own designs each week. Once I've done some work on each of those, I'd then work on whatever I felt like. I'd also like to have just a few projects for each type of needlework that I do. Over the next few years, I plan to focus on reducing my UFOs so that I don't feel so overwhelmed by the excessive number that I currently have.

I'm not going to worry about reducing the number of projects that are at the finishing stage or the number of quilts that are at the quilting/binding stage because if I keep working on those for a bit each week I should be able to keep on top of them. I'm also not going to worry about Christmas projects since I only work on those during the month of December and I only have a few anyway. Also, for the sake of brevity, in this post I'm not going to bother with images for each project; I'll just list the project names (I promise to properly credit the designers in future posts).

So, without further ado, here we go:

Swedish Weaving:

I would like to have just one Swedish weaving project. Currently I have the following:

Baby Babbles

Goal already met. Yay!

Blackwork:

For blackwork, I would like to have at most one of my own designs and one project designed by someone else. Currently I have the following:

Da Capo

Goal already met. Yay!

Knitting:

For knitting, I would like to have one summer project and one winter project. Currently I have the following:

Shawl
Soft Shoulders

Soft Shoulders is perfect for a winter project. I would prefer to have something knit with cotton or linen for a summer project, but the shawl, which I'm knitting with a laceweight yarn, isn't too heavy so it will do. I'm calling this goal already met. Yay!

Crochet:

For crocheting, I would like to have one summer project, one winter project, and one scrap-eater project. Currently I have the following:

Plum Granny Ripple
Step Afghan
Granny's Daughter
Country Quilt Footstool Caddy

Plum Granny Ripple is a good summer project and the Step Afghan is a good winter project. Granny's Daughter is a scrap afghan consisting of 1 1/2" one-round granny squares crocheted together with a main color. It's a perfect project for using up scraps that are too small to be used in other projects.

So, to meet my crocheting goal I'll need to finish the Country Quilt Footstool Caddy.

Quilts - Piecing:

For quilts that are in the piecing stage, I would like to have one of my own designs and one project designed by someone else. Currently I have the following:

Hidden Stars
Old Mill Pond
Around the Town
Snuggles Quilts Block-of-the-Month (BOTM) (the designer never gave this a name)

Hidden Stars is my own design. That leaves 3 designed by others. Old Mill Pond will take the longest to finish, so in order to meet this goal I plan to finish piecing Around the Town and design a setting (I didn't like the designer's) for the blocks in the Snuggles Quilts BOTM and finish piecing it.

Cross Stitch:

For my cross stitch projects, I would like to have one of my own designs and one project designed by someone else. Currently I have the following:

Bright Feathers
Mask of Colors 1
Fish City
Noah's Sub
Joy of Computer Work
Brilliant Butterfly Celebration
Kitty Litter
Elements of Nature I
Elements of Nature II
Celtic Gilt Sun
Serenity
Starry Night
Planetarius
Dolphins' Domain
Rose Cross

Yikes.

Now, Mask of Colors 1 (and its companion piece), Fish City, and Noah's Sub are all giant projects that will take me years to finish, so I'm not going to worry about them; I'll just make sure not to start any more giant cross stitch projects.

Bright Feathers is my own design.

That leaves the following projects by other designers that need to be whittled down to just one:

Joy of Computer Work
Brilliant Butterfly Celebration
Kitty Litter
Elements of Nature I
Elements of Nature II
Celtic Gilt Sun
Serenity
Starry Night
Planetarius
Dolphins' Domain
Rose Cross

Obviously, I'm not going to be able to finish all of those in just one year. I'll need to spread them out over a few years, starting with the smaller ones so that I feel like I'm making progress.

So finally, after reviewing the above, I've decided to finish (or at least get to the finishing or quilting/binding stage) 6 projects this year. That's 2 months per project, which seems reasonable. I'll do the projects needed to meet my goals plus enough of the cross stitch projects to make a total of 6.

My goal for 2017 is to finish the following:

Country Quilt Footstool Caddy
Around the Town
Snuggles Quilts Block-of-the-Month (BOTM)
Elements of Nature I
Serenity
Rose Cross

So, my plan for this year is to work on one finishing project, one quilting/binding project, and one of my own designs each week, and then focus on the 6 projects listed above. If I do that, then by the end of the year I should have reduced my UFOs to a reasonable number, except for the cross stitch projects, of course.

Thursday, November 3, 2016

Batik Cascade

I finally finished Batik Cascade (Batik Go-Round) by Karen Combs.


And now we are so happy, we do the dance of Joy!


I pieced and quilted this all by hand, and at 43" x 50 1/2" it's the largest quilt I've completed to date. It's also the first quilt top I ever finished. Furthermore, by finishing this project I've met my goal for the year. Yay!! :)

Unless I manage to finish something else by the end of the year (doubtful), my next post will be my yearly goal-setting post and should be up late December or early January.